Large Software Projects: Setting Up CI/CD and Deployment
Posted on October 16, 2025 • 6 minutes • 1190 words • Other languages: Español
This post is part of my Large Software Projects blog series .
In the last post , we established a robust local development environment. We have a type-safe Next.js project, beautiful components from shadcn/ui, and strict code quality rules enforced by ESLint and Prettier.
The next critical step is deployment. A local project is just a proof-of-concept; a real project is one that can be shipped reliably and repeatedly. We need to close the loop between writing code and seeing it live.
This post details how we move our tas (Town Admin System) from our local machine to a production environment using a self-hosted platform-as-a-service (PaaS) solution, establishing a simple, yet highly effective, CI/CD pipeline.
Let’s ship some code. 🚀
VPS Over Cloud-Native
When discussing deployment today, the default assumption is often “go cloud-native”: use serverless functions , managed databases , and complex orchestration tools like Kubernetes on AWS , Azure , or GCP .
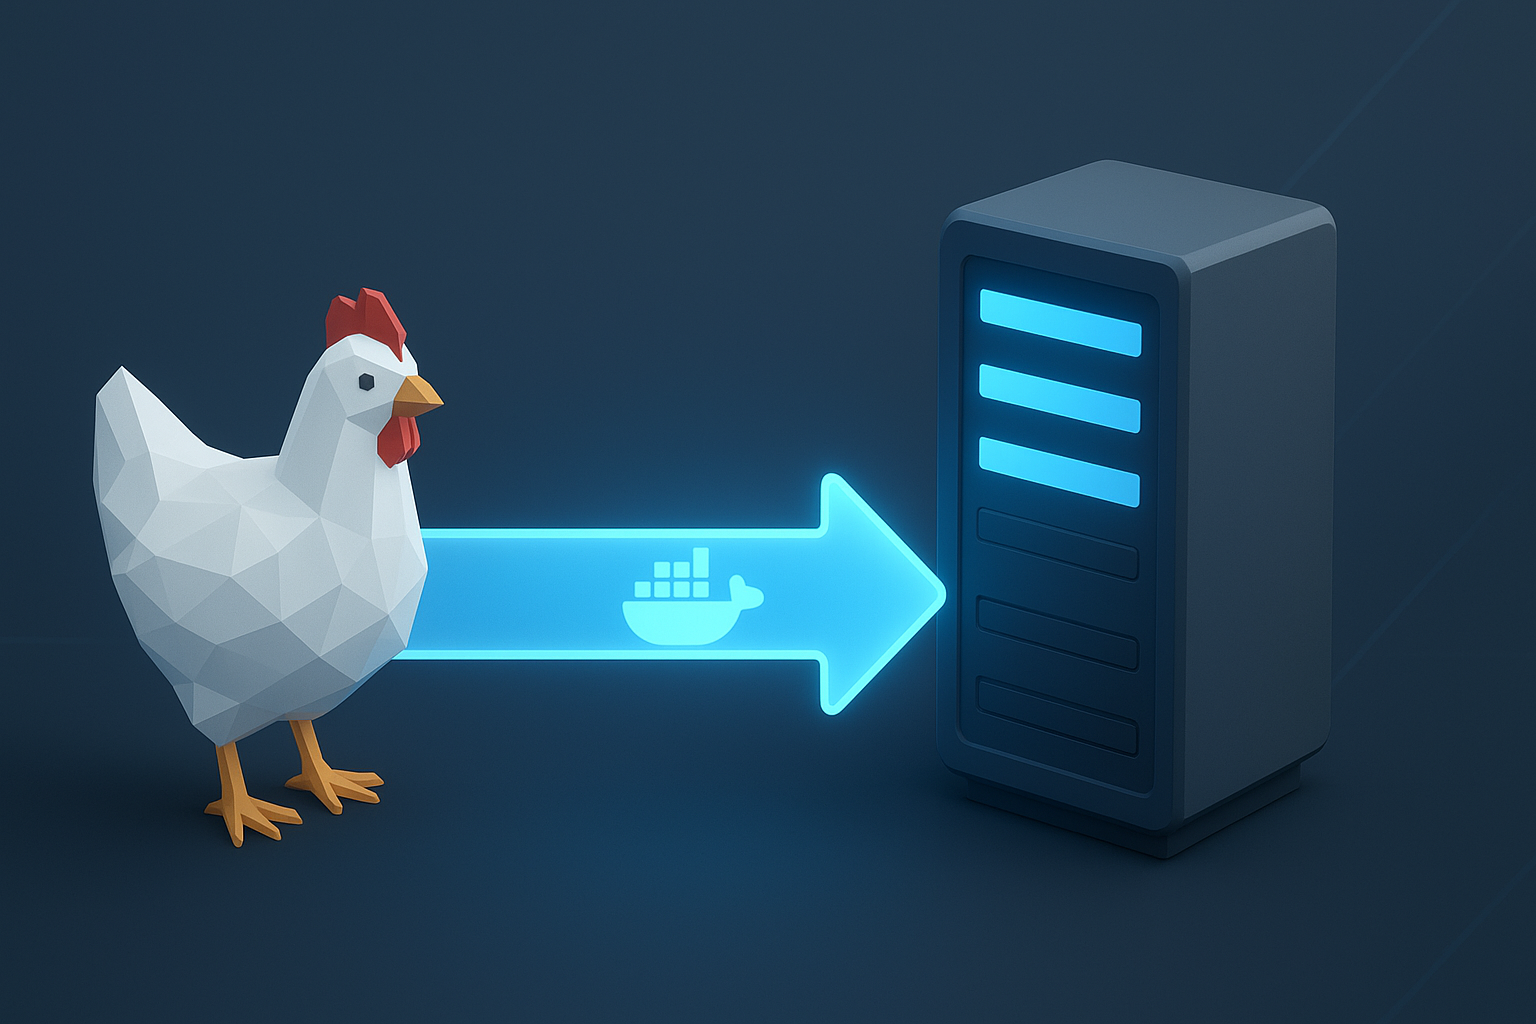
For the Town Admin System, we are intentionally choosing a different path: a dedicated Virtual Private Server (VPS) managed by the open-source platform, Coolify .
Here is why the VPS/Coolify approach makes more sense for our project than a complex, full cloud-native setup:
- Simplicity Over Complexity: A single VPS running the application is dramatically simpler to set up, maintain, and debug than managing complex distributed cloud architectures. We avoid the overhead of unnecessary orchestration tools, allowing us to build useful software without the burden of infrastructure complexity.
- Predictable Cost Control: A VPS offers predictable, fixed monthly costs. This contrasts sharply with the variable expenses of managed cloud services, ensuring we optimize for a budget-friendly model rather than preparing for theoretical, massive scale.
- Focus on Developer Velocity: Using a tool like Coolify abstracts away much of the traditional DevOps grunt work. It handles containerization, SSL management, and automated deployment—allowing the team to focus 100% on writing application features.
Coolify
Coolify acts as a self-hosted alternative to platforms like Netlify or Heroku , running entirely on our own hardware. It uses Docker under the hood to manage applications, databases, and services, offering a clean, unified dashboard for operations.
I already manage a VPS hosting a Coolify instance and I have already associated the domain pollito.tech with this Coolify instance. If you are interested in how to set up your own VPS and deploy Coolify, I cover that in detail in my VPS blog series
. Feel free to check it out. For this blog, I assume Coolify is up and running.
Step-by-Step CI/CD Setup
Our goal is simple: whenever we push changes to the main branch of our GitHub repository, Coolify should automatically pull the code, build the Next.js application, and deploy the new version to our assigned domain.
Step 1: Push Project to GitHub
First, we need to ensure our local tas project is available in a GitHub repository. The repository can be private—Coolify’s GitHub App integration handles authentication securely.
Step 2: Configure Coolify’s GitHub App
To allow Coolify to access our code and receive webhooks when we push changes, we need to integrate it with GitHub.
- Navigate to your Coolify Sources and find your existing GitHub App integration (or create a new one).
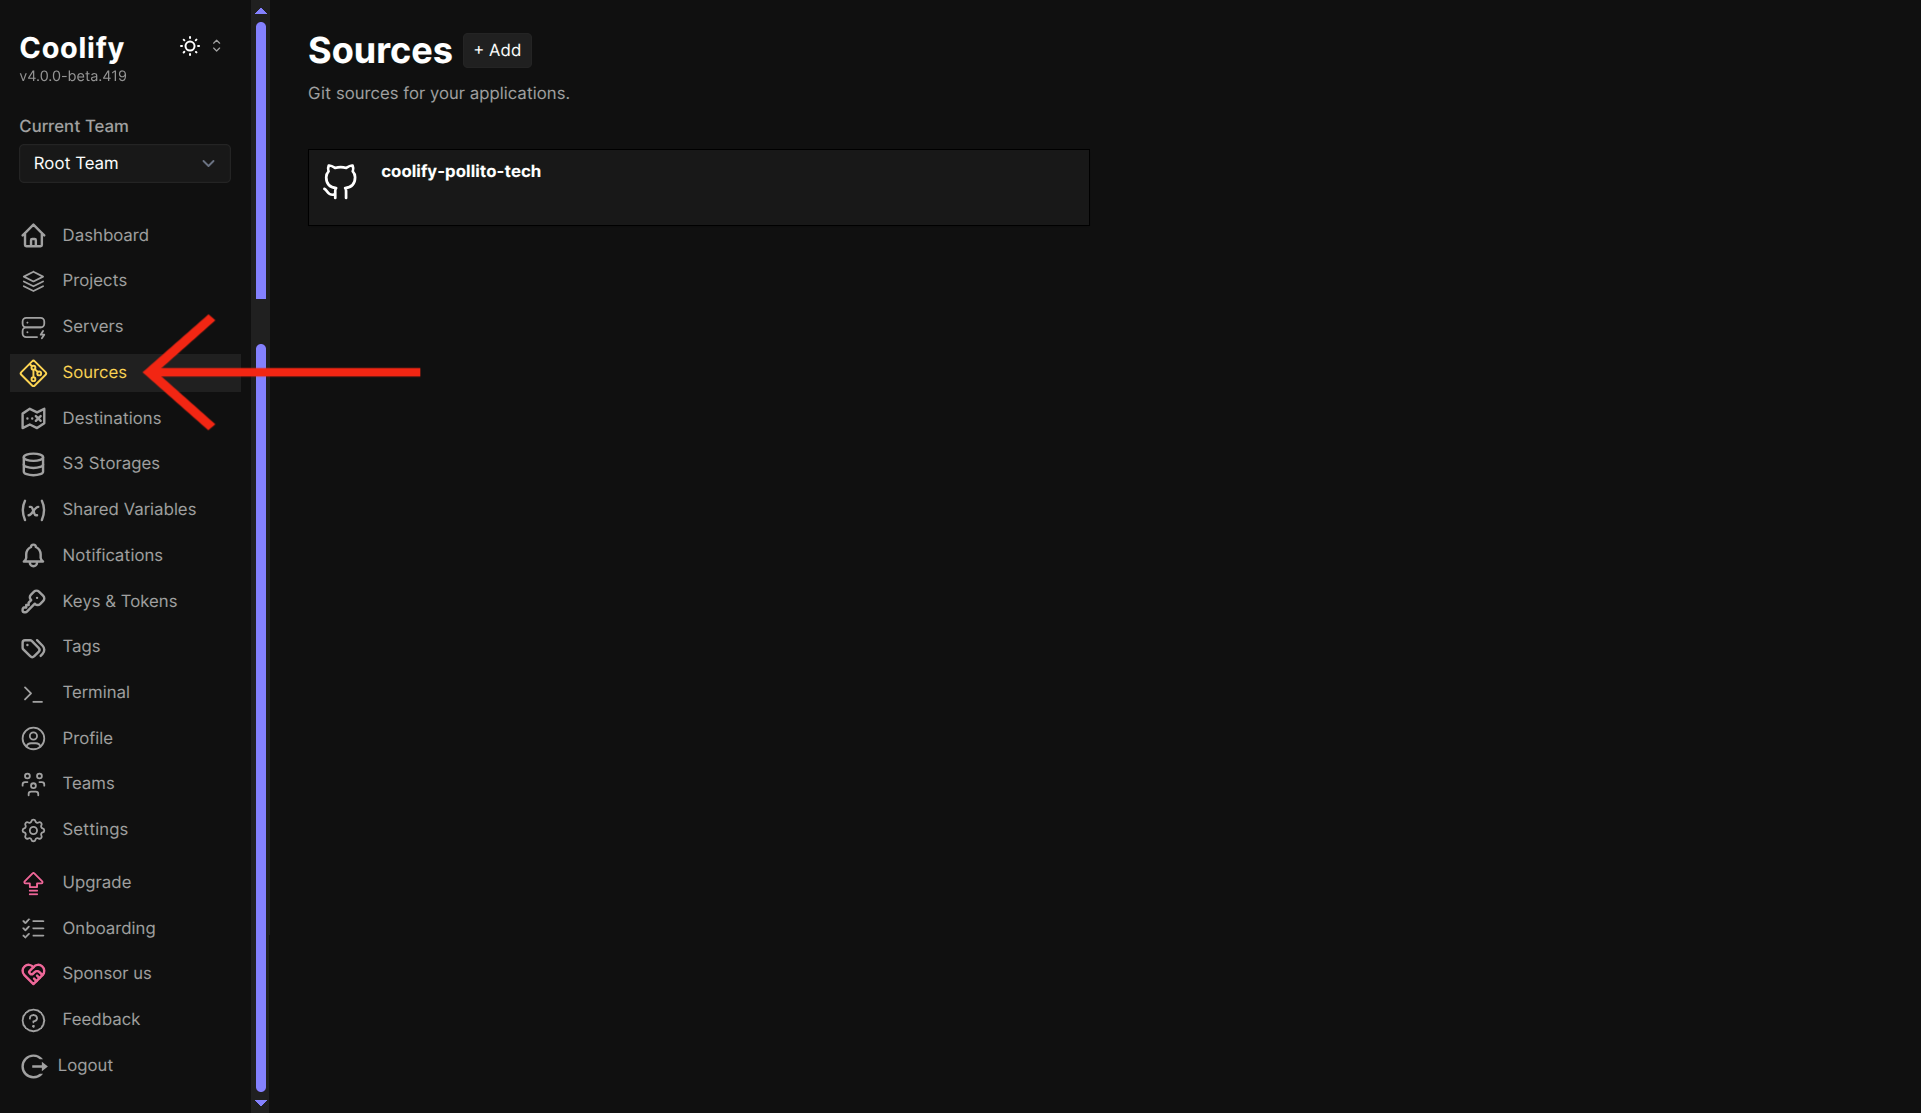
- Edit the application settings to include the newly created
tasrepository in the list of accessible repositories.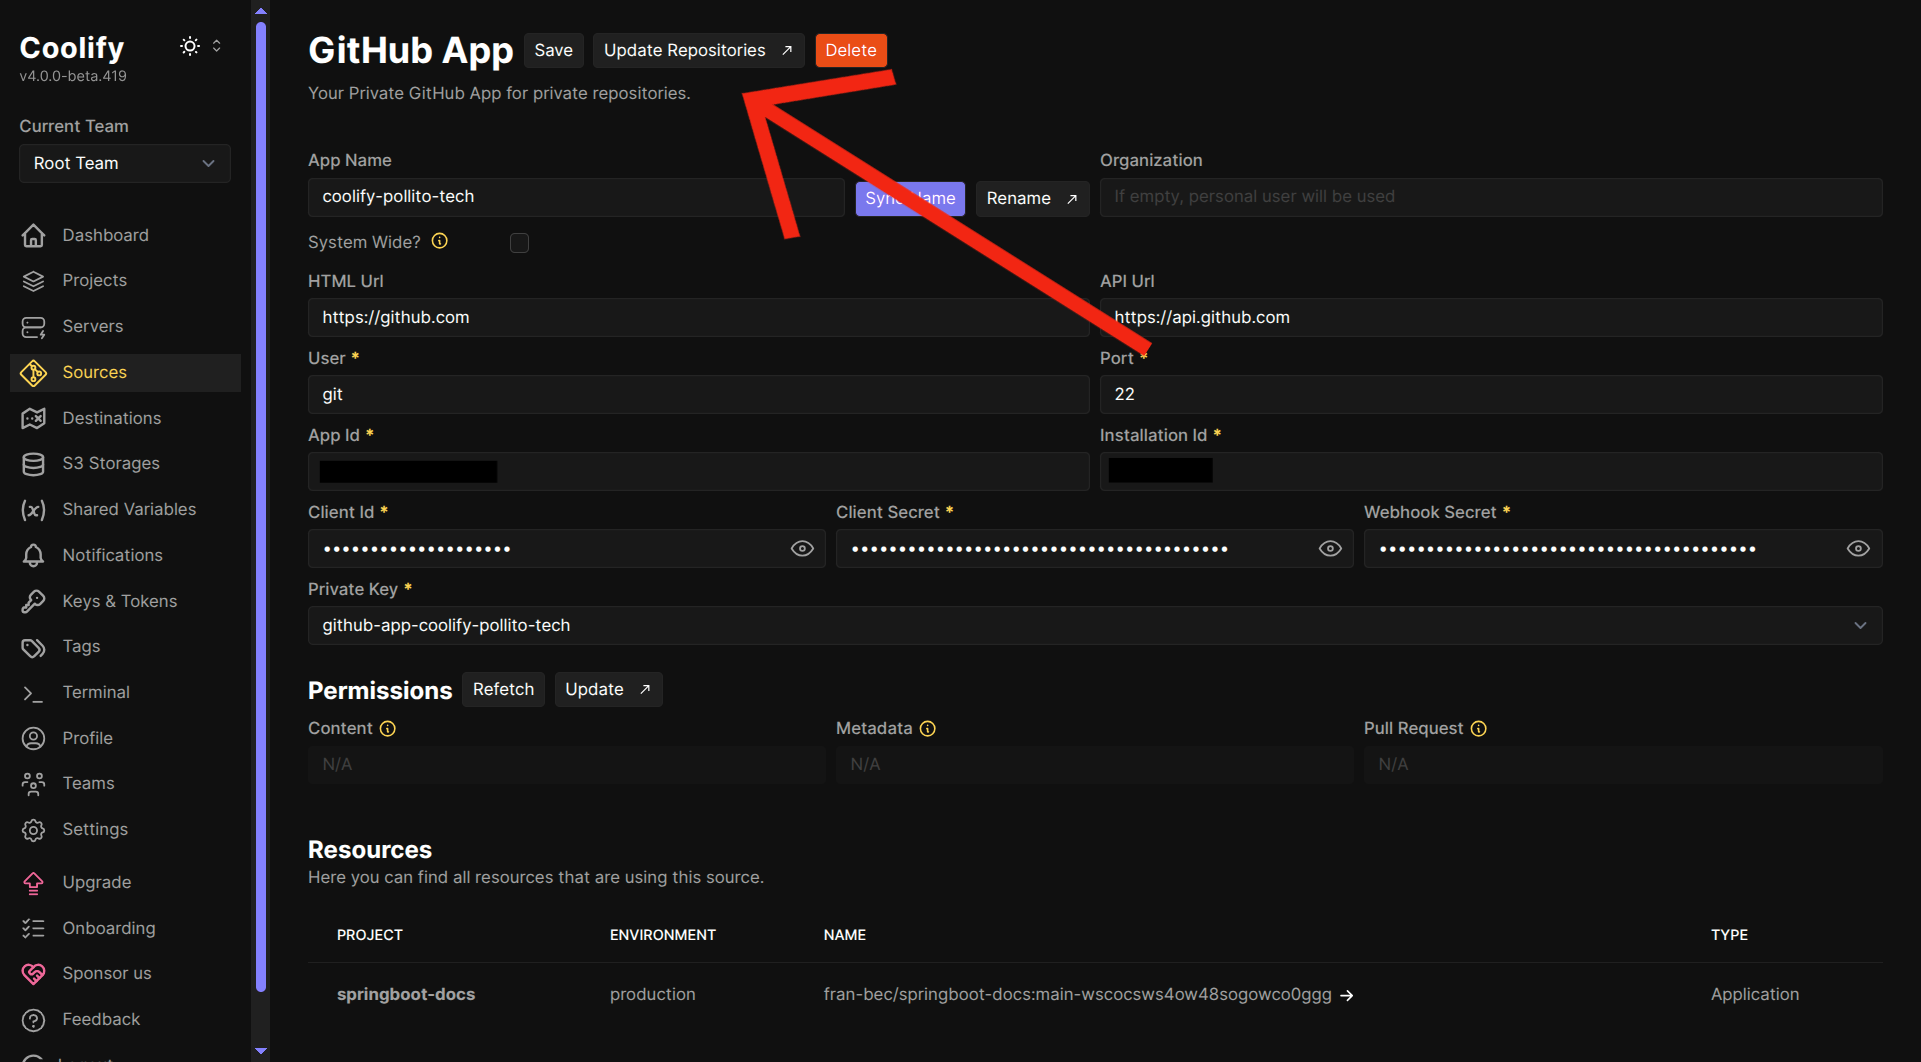
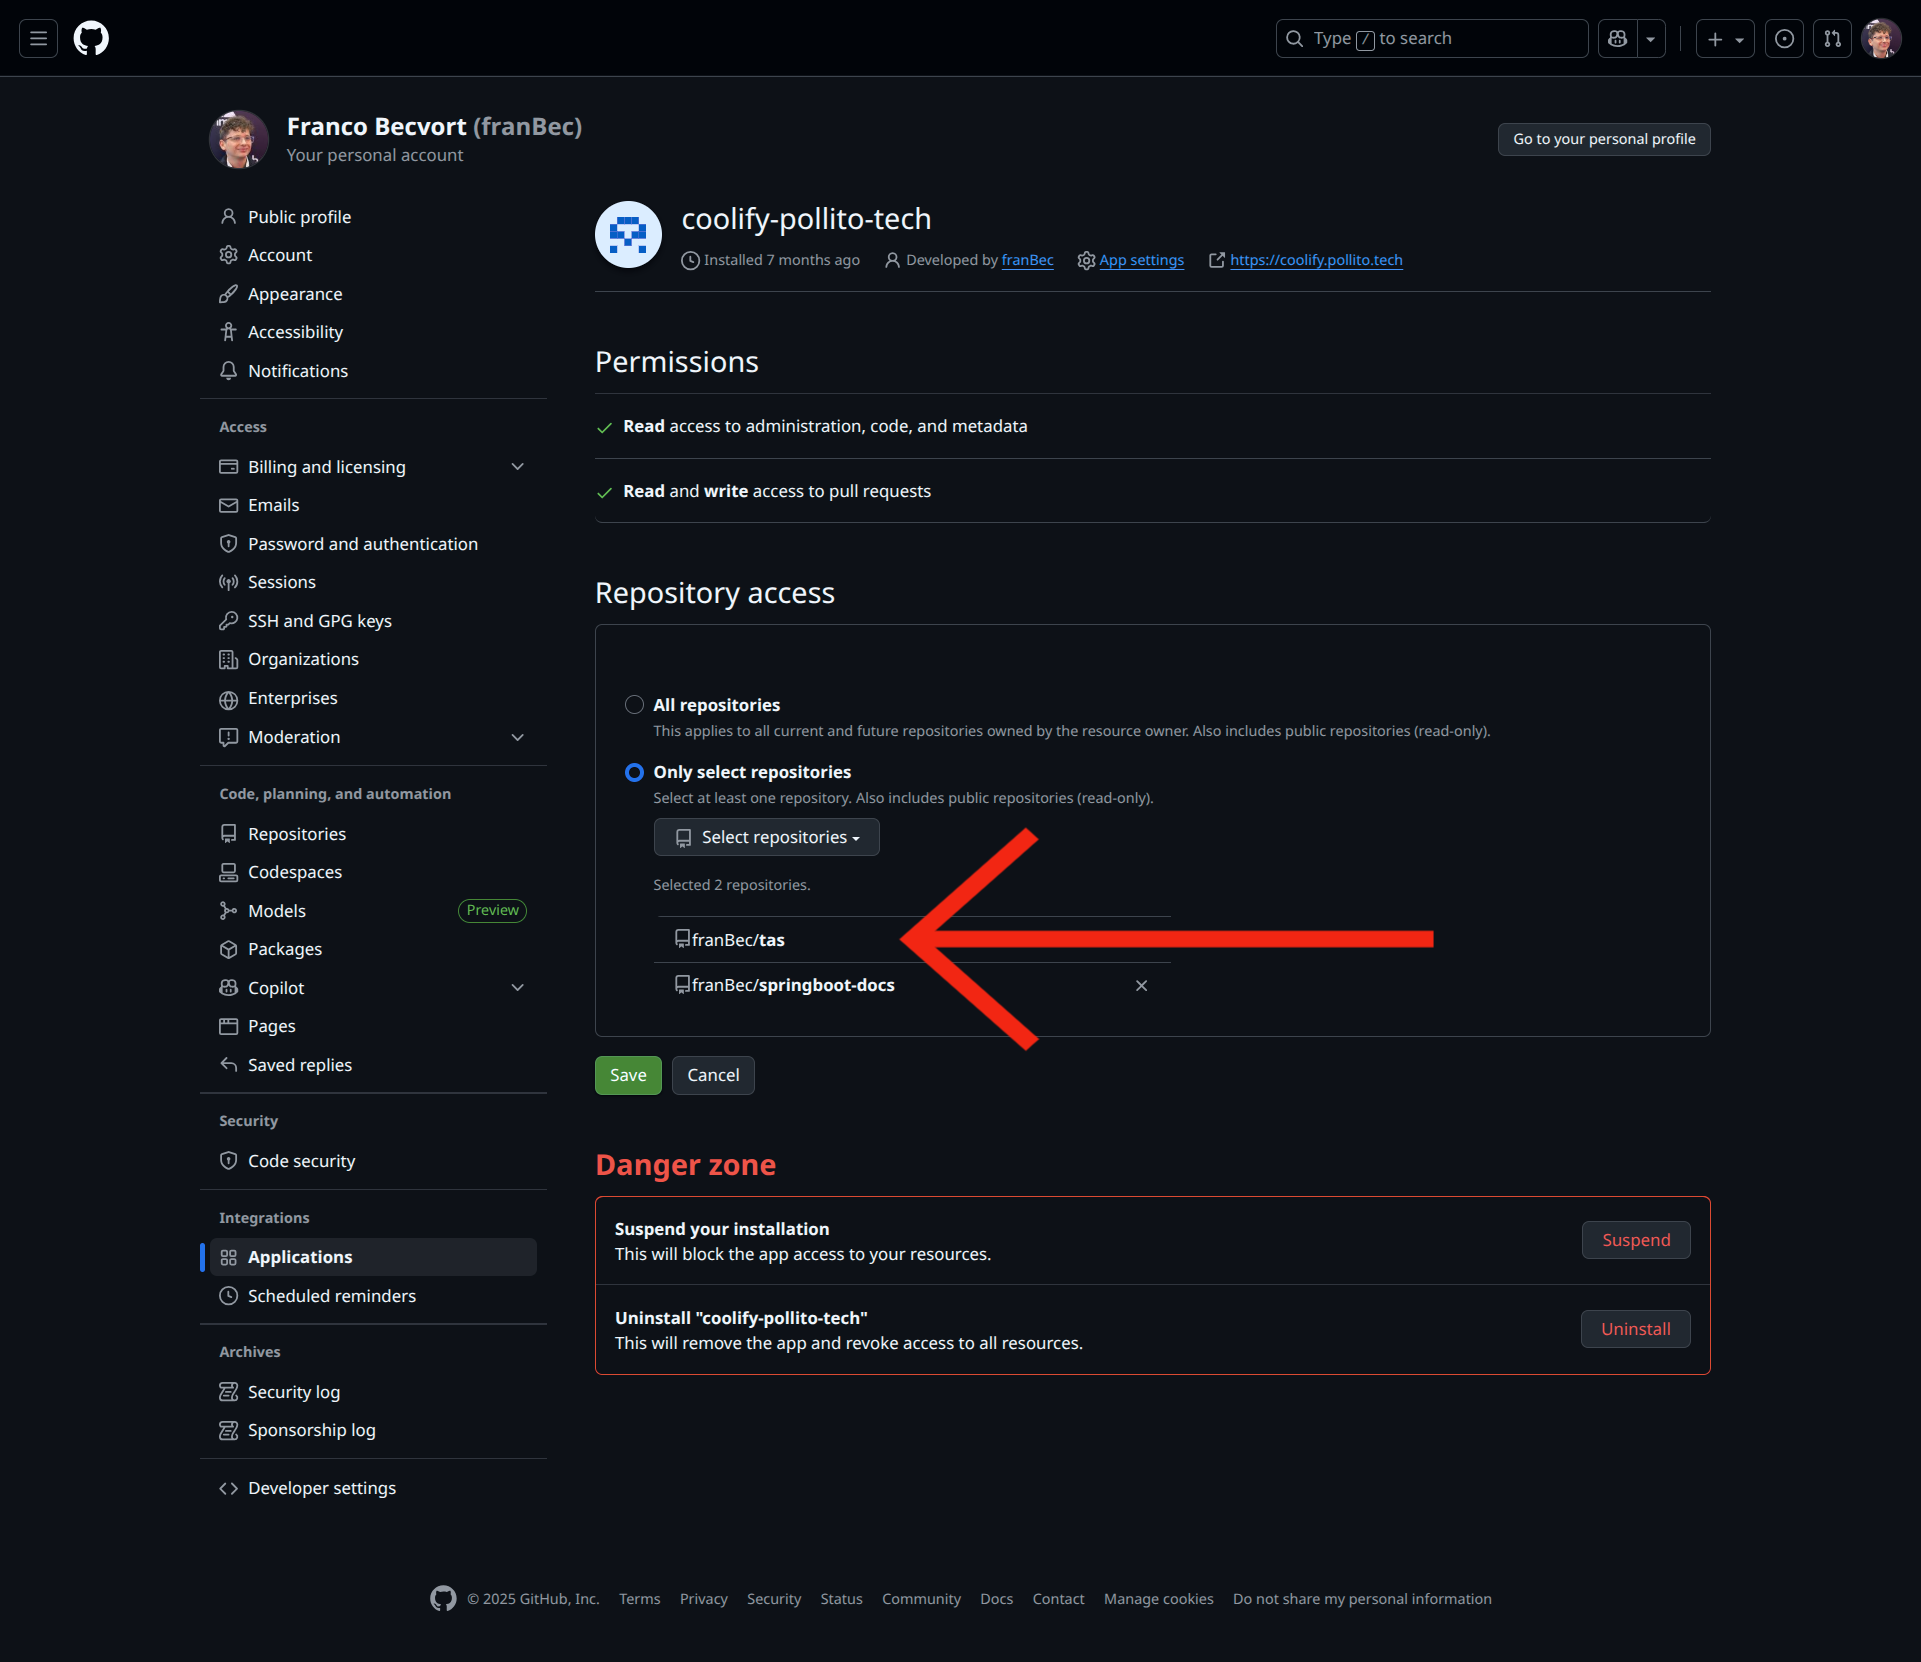
This ensures Coolify has the necessary permissions to pull the source code and listen for deployment triggers.
Step 3: Create the Project and Resource
In Coolify, we use Projects to group related applications.
- Create a New Project: I called mine “Town Admin Sys.”
- Add a New Resource: Inside the project, click “Add Resource” and select the Application type.
- Source Selection: Select “Private Repository with GitHub App”. Choose the GitHub App you configured in Step 2.
- Repository Setup: Select the
tasrepository and click “Load Repository.”
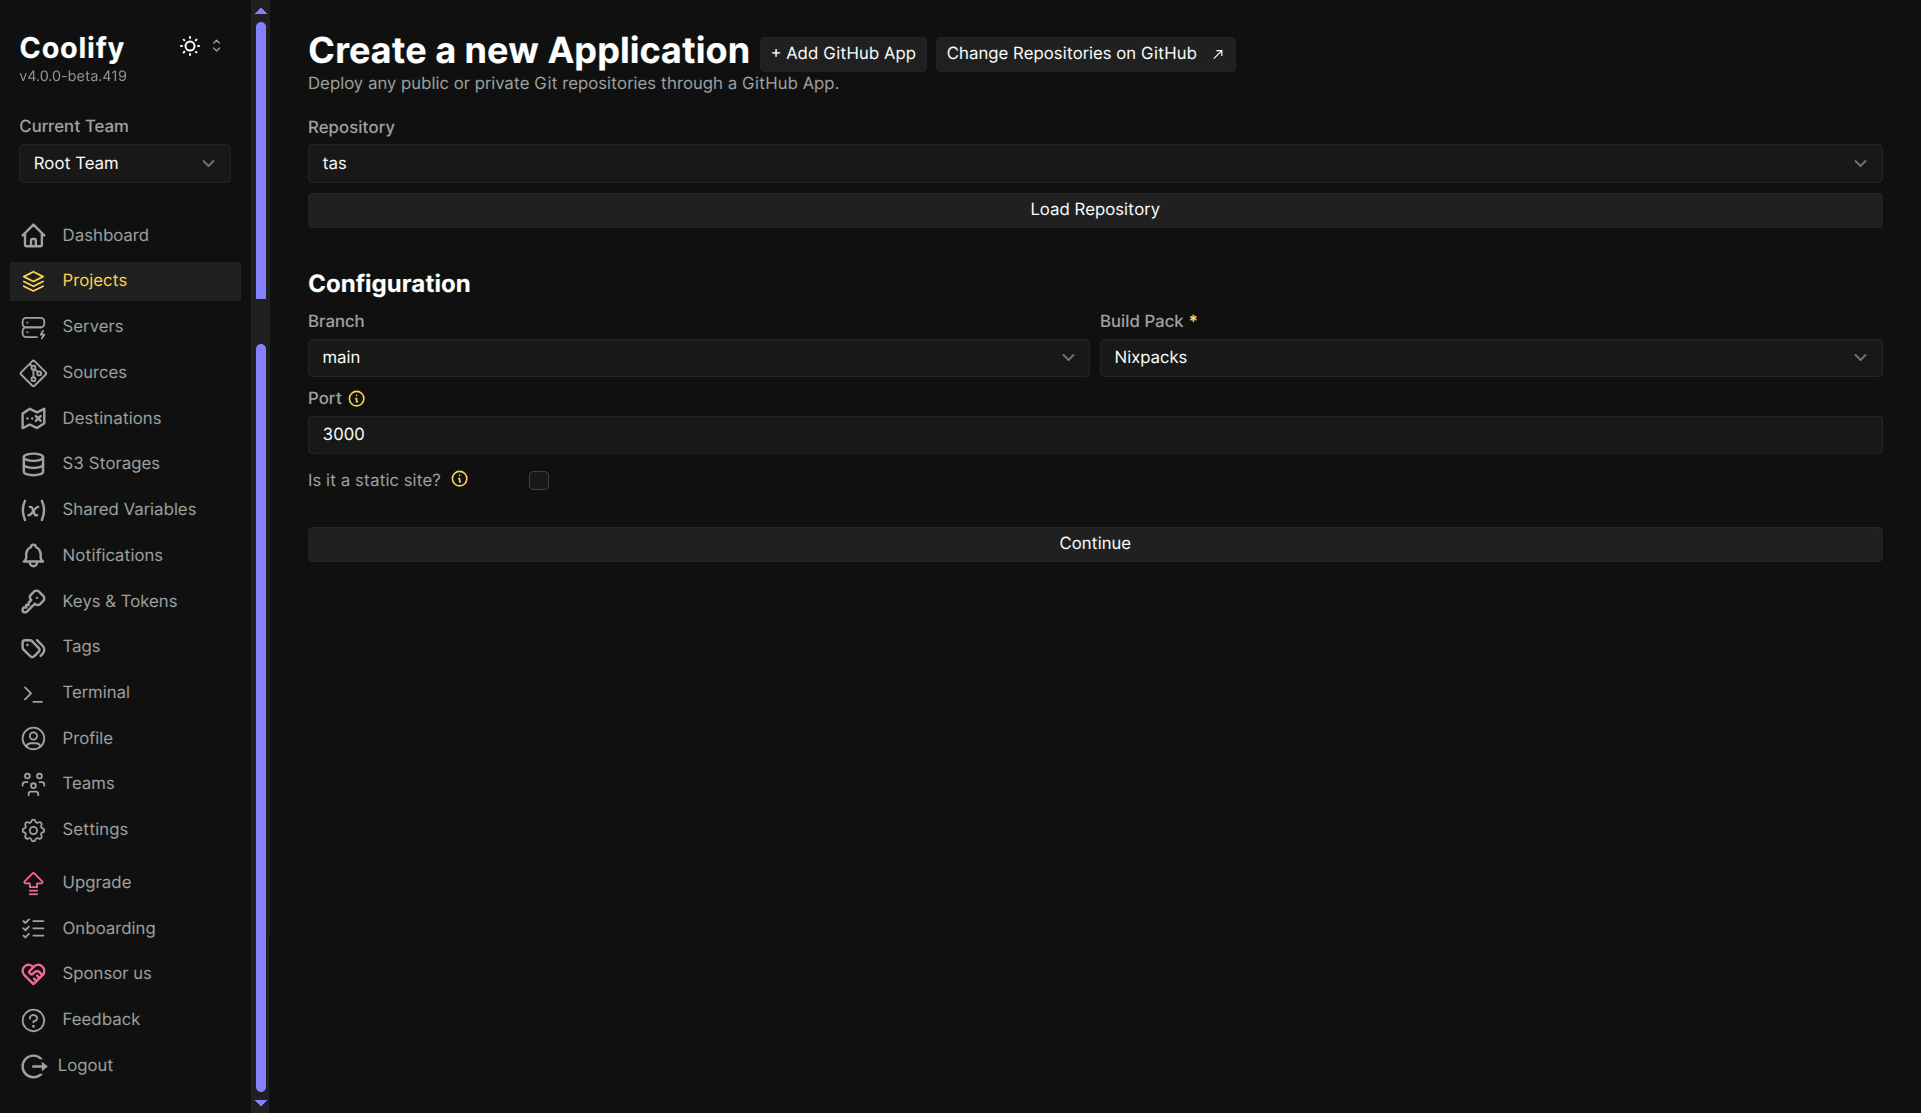
Coolify is smart enough to detect a Next.js project. We can accept all the default configuration options here.
Step 4: Configure Domain and Deploy
After accepting the basic configuration, you are redirected to the detailed settings page.
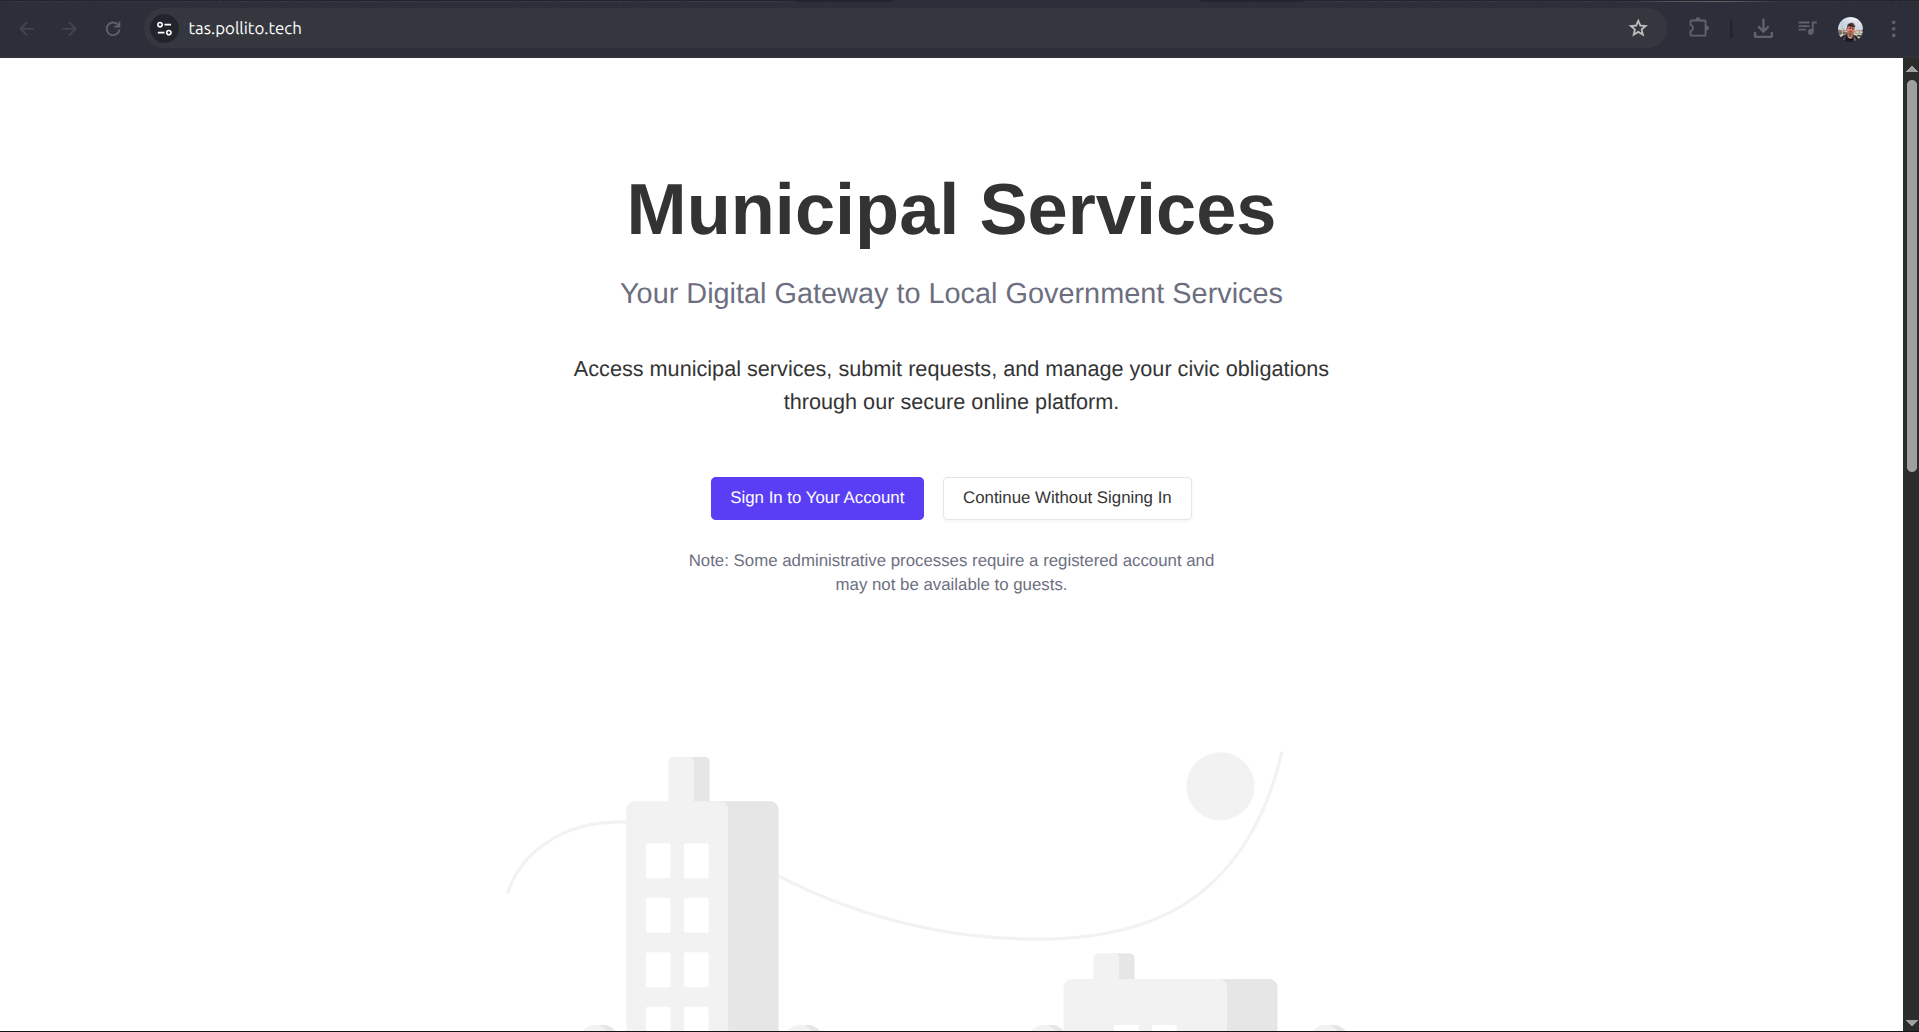
- Domain Configuration: Scroll down to the network section and specify the domain where the application should live. I chose the simple and descriptive subdomain: tas.pollito.tech .
- Deployment: Click the “Deploy” button.
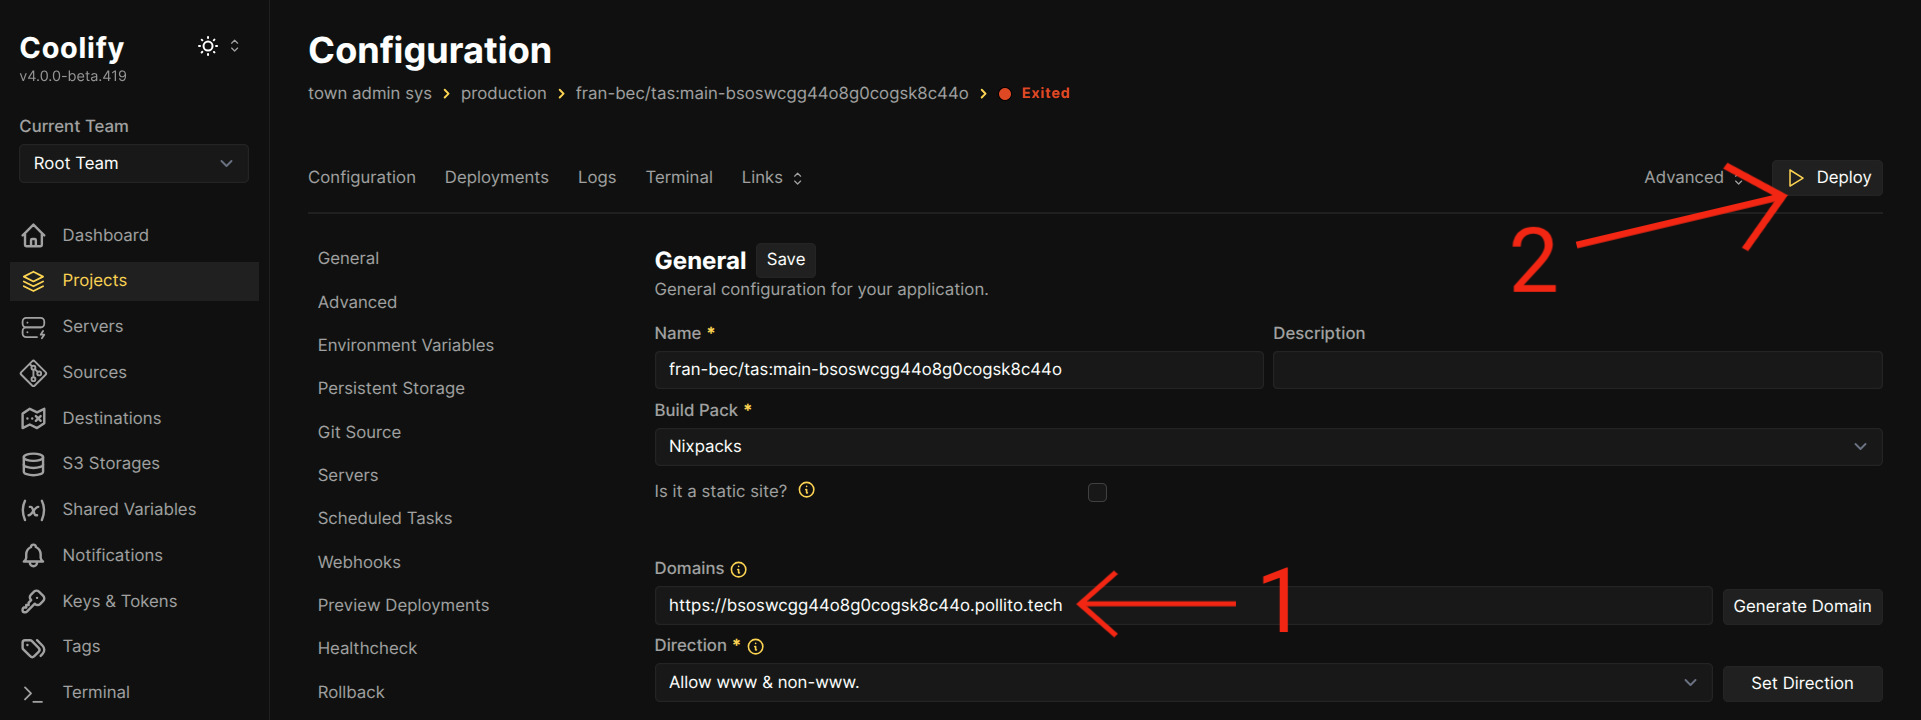
Coolify now takes over. It pulls the code, builds the application inside a container, automatically generates an SSL certificate for tas.pollito.tech, and starts the server. This process takes a few minutes, after which your application is live.
The CI/CD Loop
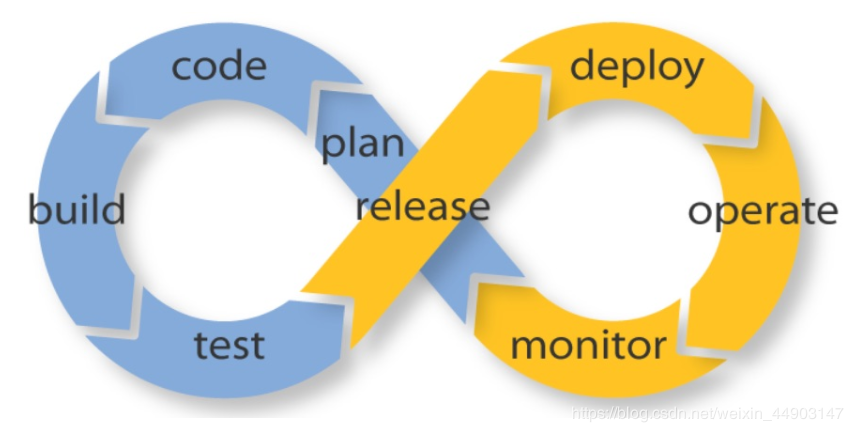
The goal of Continuous Integration (CI) and Continuous Delivery (CD) is to establish a seamless, automated pipeline that moves code changes rapidly and reliably into production.
A successful CI/CD system typically follows an infinite loop: Plan → Code → Build → Test → Release → Deploy → Operate → Monitor, and back to Planning.
What We Have Achieved
By integrating GitHub with Coolify, we have successfully established the essential backbone of our pipeline: the automated delivery cycle.
The loop we have closed is: Code → Build → Deploy.
- Trigger: A change is merged into the
mainbranch on GitHub. - Webhooks: GitHub instantly notifies Coolify.
- Automation: Coolify pulls the latest code, executes the build commands (
pnpm install,pnpm run build), and instantly deploys the new container image.
Within minutes of merging code, the changes are live on tas.pollito.tech, with zero manual effort required from the developer. This rapid feedback loop is crucial for developer morale and speed, ensuring we can “move fast” and validate our features immediately.
What is Still Missing
While we have achieved Continuous Deployment, our current setup is intentionally simple and is missing on code quality:
- Automated Testing : We currently have no automated tests (we don’t have anything worth testing yet). A crucial part of CI is running a test suite before deployment. If our application breaks during the build process, Coolify will catch it, but if the application builds fine but contains a runtime bug, it will be pushed live.
- Security and Quality Gates : There are no formal steps to check for security vulnerabilities (e.g., dependency scanning) or deep code analysis beyond what ESLint provides locally.
As the project grows, integrating these quality checks into the Coolify build process will be a priority to prevent regressions and solidify the integrity of the codebase.
For now, we have a fast path to production.
What’s Next?
We’ve moved from an empty folder to a fully built, stylized, and automatically deployed application. The foundational work is complete.
In the next post, we will switch gears back to front-end development:
- UX Sketching: I will use Excalidraw (since I never learned Figma) to sketch out the key user flows and interface concepts for the system, focusing on the main routes like Sign-in/Sign-up and the “Government Area” dashboard grid.
- Implementation: We will implement these core routes, making use of our shadcn/ui foundation to create a professional and navigable user experience.
Next Blog: Large Software Projects: Structuring the Frontend